Designer of postcards, posters, cards with photos and text
With this application, you can create a postcard, poster in a couple of minutes. It can be a greeting card or a postcard - a greeting with warm words, a poster announcing an event or an information card with a photo and a signature. The finished image can be downloaded immediately.

Use the settings to replace text, background and photos with your own!
designed by Nil
Template


Background
Photo
Turn Off
Scale:
Stroke Weight: 7px
Stroke Color:
Rounding left top: 50%
Rounding left bottom: 50%
Rounding right top: 50%
Rounding right bottom: 50%
Text
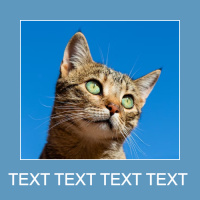
Text next to the photo. You can use line breaks to create paragraphs or alignment
Отредактируйте или удалите этот текст. На компьютере править текст также можно непосредственно в шаблоне (двойной клик мышкой)
Use the settings to replace text, background and photos with your own!
designed by Nil
Use the settings to replace text, background and photos with your own!
designed by Nil
Font:
Or own Font Family:
Font Size:
Stroke color and thickness for text:
1px

More about the application
 |
11 november 2017 updated 5 march 2025
|

An updated version of the designer of postcards and posters. More settings for card design, the ability to choose the orientation of the postcard (portrait, landscape), the ability to download the finished postcard in a high enough resolution for printing, soon - new templates, layouts.
Creating postcards with this tool is easy.
1. If you plan to print a finished postcard, it is recommended to use a photo with a size of 2000 pixels or more on either side to insert.
2. Select a layout from the list. They differ in the arrangement of blocks for text and for photos (right, left, 30% to 70%, 50% to 50%), for postcards stretched horizontally, for postcards stretched vertically.
3. Select a background.
By default, the photo “Tulips” is used as the background (source: unsplash.com/photos/pink-and-yellow-tulips-in-bloom-QeqJ6c7IlTU)
To change, open the "Background" tab in the postcard settings.
You can use any image as a background. For example, a photo from your album or a suitable picture that you found on the Internet, on a photo stock. Choose an image for the background that has the same aspect ratio as the postcard layout or close to it. It is recommended to use images with a size of at least 2000 pixels on each side. If the proportions of your photo do not match the proportions of the template, the uploaded photo may be slightly cropped along one of the edges.
Instead of images, you can use color fill for the background. Choose any color from the palette or create a gradient of two colors.
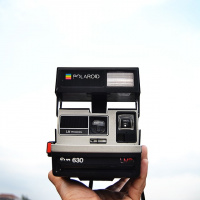
4. Insert a photo.
By default, layouts are enabled to display the photo on top of the main background. For example, we use a stock photo: unsplash.com/photos/womens-gray-and-white-crew-neck-short-sleeved-dress-lc5YHJU2IME. You can completely disable the second image and use only the image for the background with text on top of it .
To insert, edit, or delete a photo on top of a photo, open the "Photo" tab in the photo settings.
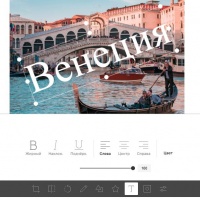
You can move the uploaded photo inside the frame and scale it. On a computer you can do this using the mouse. To zoom, turn the mouse wheel, to move, hold down the left mouse button on the photo and move it.
You can make the corners of your photo rounded. Use the special sliders in the settings panel in the "Photo" section to select the degree of roundness for different angles.
By default, there is a small colored outline around the photo area. If you choose rounded corners for a photo, then the stroke also becomes rounded. You can change the stroke color and thickness in the Photo settings block.
5. Add a caption
Immediately after loading the template, there is already text in the text area, to change it or delete the text completely, click in this place and edit the text.
You can use line breaks to separate text into paragraphs or move text to the correct height position.
For text alignment "left", "right", "center" there are special buttons in the settings panel.
Choose the font, text color and text size.
6. When everything is ready, click on the "Save" button. A window with the result will appear and you can immediately download the finished postcard or go back to make edits.
7. To continue editing the postcard, click on the "back" button and you can make changes to the postcard project again.
Creating postcards with this tool is easy.
1. If you plan to print a finished postcard, it is recommended to use a photo with a size of 2000 pixels or more on either side to insert.
2. Select a layout from the list. They differ in the arrangement of blocks for text and for photos (right, left, 30% to 70%, 50% to 50%), for postcards stretched horizontally, for postcards stretched vertically.
3. Select a background.
By default, the photo “Tulips” is used as the background (source: unsplash.com/photos/pink-and-yellow-tulips-in-bloom-QeqJ6c7IlTU)
To change, open the "Background" tab in the postcard settings.
You can use any image as a background. For example, a photo from your album or a suitable picture that you found on the Internet, on a photo stock. Choose an image for the background that has the same aspect ratio as the postcard layout or close to it. It is recommended to use images with a size of at least 2000 pixels on each side. If the proportions of your photo do not match the proportions of the template, the uploaded photo may be slightly cropped along one of the edges.
Instead of images, you can use color fill for the background. Choose any color from the palette or create a gradient of two colors.
4. Insert a photo.
By default, layouts are enabled to display the photo on top of the main background. For example, we use a stock photo: unsplash.com/photos/womens-gray-and-white-crew-neck-short-sleeved-dress-lc5YHJU2IME. You can completely disable the second image and use only the image for the background with text on top of it .
To insert, edit, or delete a photo on top of a photo, open the "Photo" tab in the photo settings.
You can move the uploaded photo inside the frame and scale it. On a computer you can do this using the mouse. To zoom, turn the mouse wheel, to move, hold down the left mouse button on the photo and move it.
You can make the corners of your photo rounded. Use the special sliders in the settings panel in the "Photo" section to select the degree of roundness for different angles.
By default, there is a small colored outline around the photo area. If you choose rounded corners for a photo, then the stroke also becomes rounded. You can change the stroke color and thickness in the Photo settings block.
5. Add a caption
Immediately after loading the template, there is already text in the text area, to change it or delete the text completely, click in this place and edit the text.
You can use line breaks to separate text into paragraphs or move text to the correct height position.
For text alignment "left", "right", "center" there are special buttons in the settings panel.
Choose the font, text color and text size.
6. When everything is ready, click on the "Save" button. A window with the result will appear and you can immediately download the finished postcard or go back to make edits.
7. To continue editing the postcard, click on the "back" button and you can make changes to the postcard project again.